Airstream Replacement Belt Trim for Travel Trailers
Shipping calculated at checkout
Goes Great With
Airstream Replacement Trim Tool Bundle
Airstream Replacement Trim Tool Bundle

Airstream Replacement Rub Rail for Travel Trailers
Airstream Replacement Rub Rail for Travel Trailers
Airstream Replacement Belt Trim for Travel Trailers
Airstream Replacement Belt Trim for Travel Trailers
Add stylish flair to the exterior of your riveted aluminum Airstream with our Airstream Premium Replacement Belt Trim. If you're looking to revitalize your Airstream with its original chrome belt trim color or want to add some sleek black trim, our Premium Replacement Belt Trim is the perfect solution – and it's easy enough to do at home with a few simple tools.
You can purchase Belt Trim in two lengths – one for 16'-20' trailers and one for 20'-34' trailers. We also offer Adhesive Primer and a Trim Tool for purchase a la carte, or as part of a convenient bundle.

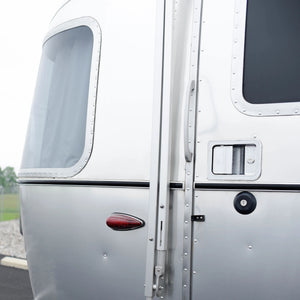
What is Airstream Belt Trim?
Late model Airstream travel trailers – and many vintage models – are equipped with a 5/8" channel that wraps around the horizontal centerline of the trailer. Inside that channel, a ribbon of high-quality belt trim provides exterior style and functional performance. This belt trim is fixed in place with an adhesive backing, and it's easy to remove and replace should you so desire. Our Airstream Premium Replacement Belt Trim is specifically crafted to fit that 5/8" channel that wraps around the middle of your Airstream's body.
Why Choose Airstream Premium Replacement Belt Trim?
- Renew and Refresh: Revitalize your Airstream’s appearance by replacing old, worn-out trim with our premium product. Enjoy a like-new look that stands out on the road and at the campsite.
- Top-Notch Quality: Made from durable, high-grade materials, our belt trim is designed to withstand the test of time. It resists weathering, UV rays, and corrosion, ensuring your Airstream looks pristine no matter where your adventures take you.
- Dependable Performance: Used on the Airstream production floor and installed by service technicians in Jackson Center, Ohio, our belt trim is specifically sourced for the perfect fit and lasting performance.
- Effortless Installation: With easy-to-follow instructions and almost all necessary tools included, our belt trim is designed for a straightforward installation process. Suitable for both DIY enthusiasts and professional installers.
Pick from Three Different Color Options
 Chrome (Replacement Trim)

Gunmetal (Matte Dark Grey as found on Trade Wind Travel Trailers)

Black
Don't forget your tools: Check our conveniently bundled replacement trim tools for an easy DIY project.
Product Features
How to Install Replacement Belt Trim and Rub Rail
Tools and Materials Needed:
- Belt Trim: Available in two lengths (16'-20' trailer length and 20'-34' trailer length)
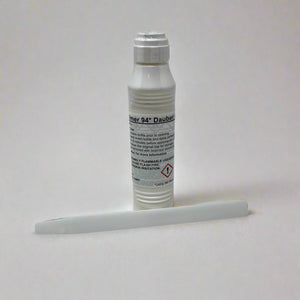
- Adhesive Primer: Shop here, or as part of our convenient bundle
- Trim Tool: Shop here, or as part of our bundle
- Denatured Alcohol: Commonly available at your local hardware store
- Rags: For applying the denatured alcohol and cleaning up any spills
- Snips: For cutting the belt trim cleanly
Directions:
- Extend your awning for full access to the belt trim.
- Extend your front panoramic window shade.
- Use our Trim Tool to pry up one edge of the old belt trim.
- Peel off old belt trim and discard.
- Use our Trim Tool to scrape off any adhesive residue that remains in the channel.
- Use denatured alcohol to help remove any stubborn gum that remains in the channel.
- Apply Adhesive Primer in the channel, while taking care to not spill any primer on the exterior of the trailer. Clean up spills quickly.
- Let primer sit for one minute.
- Peel off the tape backing on the Belt Trim and secure one end at the start of the channel.
- Work slowly to press the new Belt Trim into the channel, working your way around the whole trailer.
- When you arrive at the end of the channel, carefully notch the Belt Trim where you want to cut.
- Cut the Belt Trim to the right length, and press into the channel. Don't worry if you go over or cut a little bit short: Belt Trim can be pressed into the channel with some wiggling, or gently stretched to meet the end of the channel.
Shipping FAQ
Return Policy

VISIT THE MOTHERSHIP
Take a factory tour, step back through Airstream history in our Heritage Center, and grab some authentic Streamer gear.
MADE JUST FOR YOU
From custom-sized bedding to teak mats and replacement curtains we have all the custom goods that are made especially to fit your home on wheels.