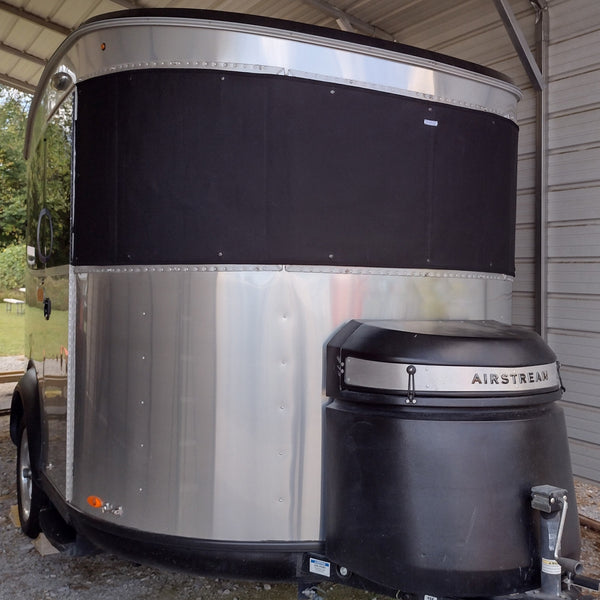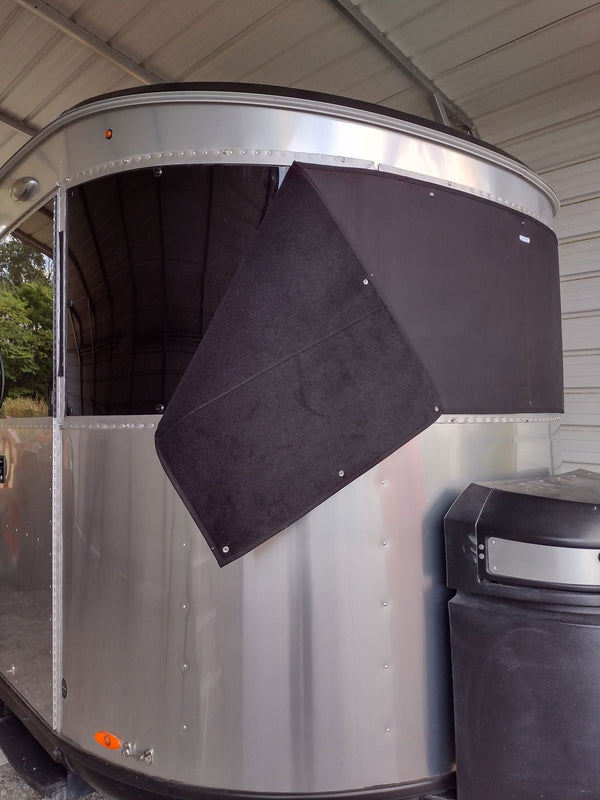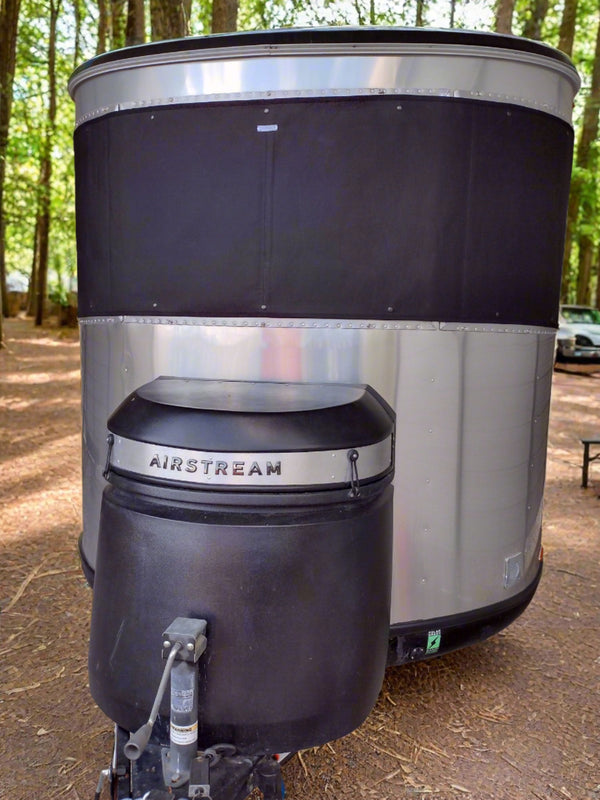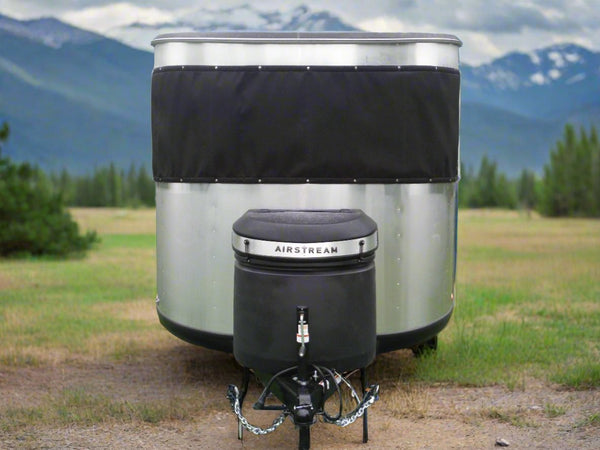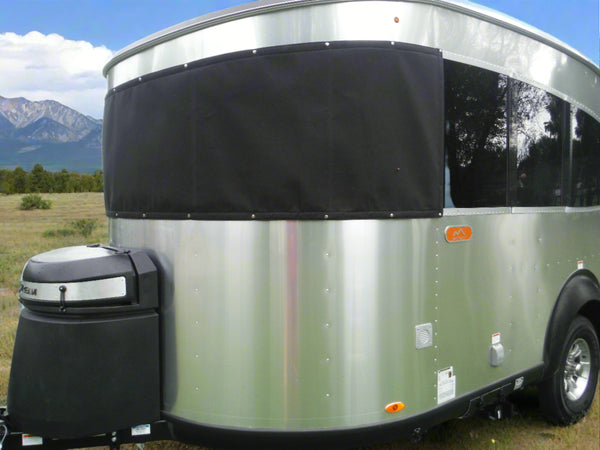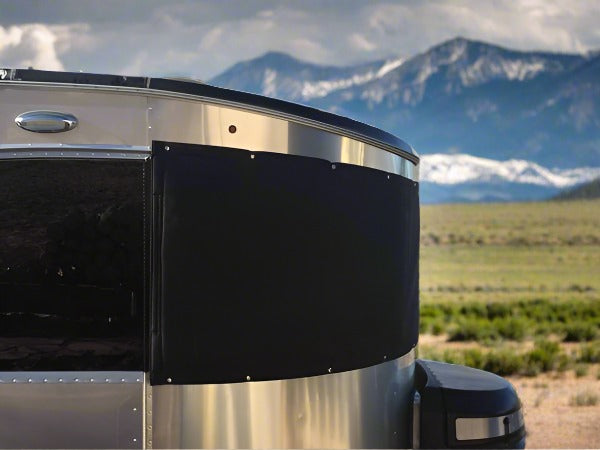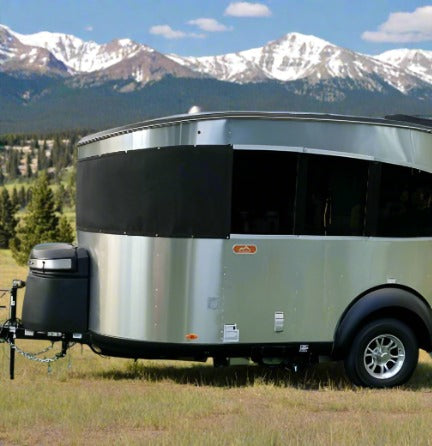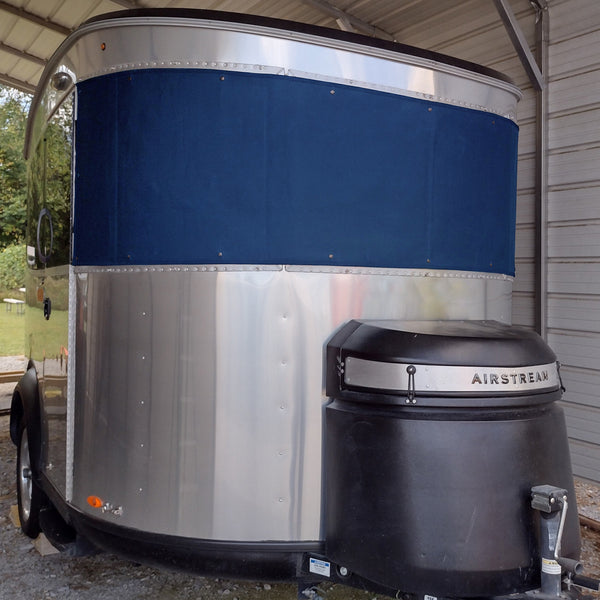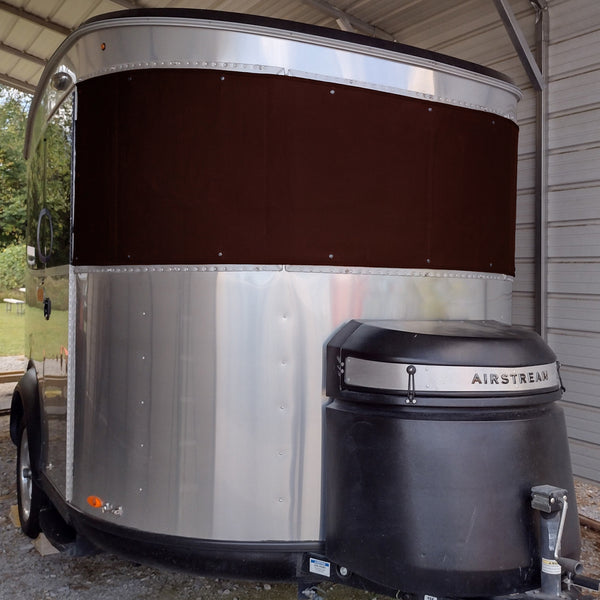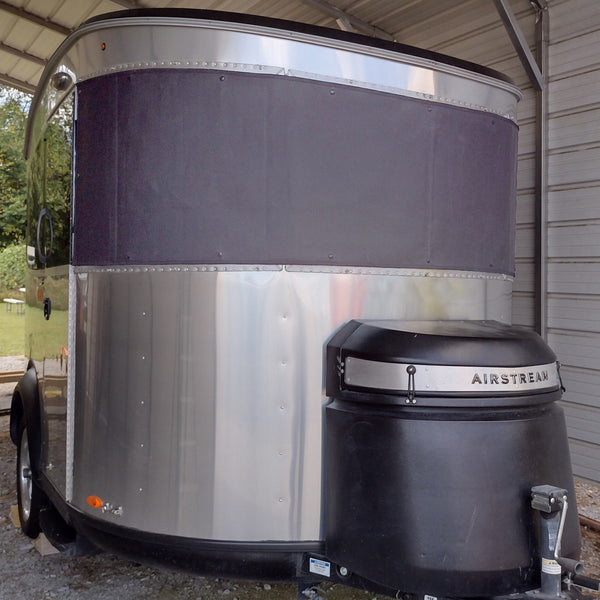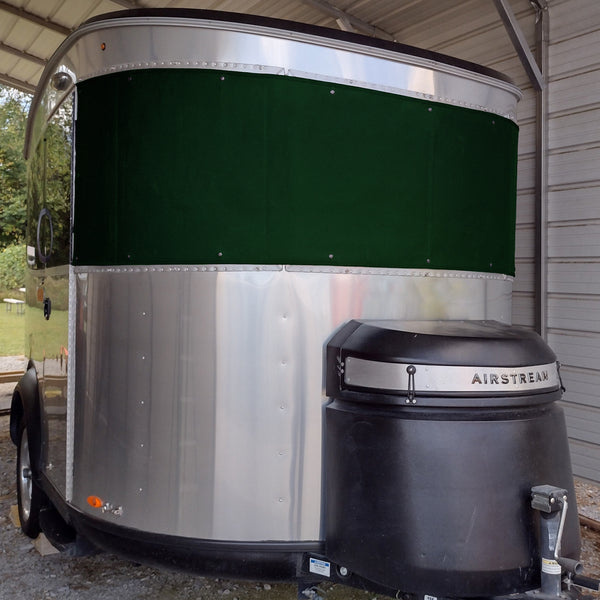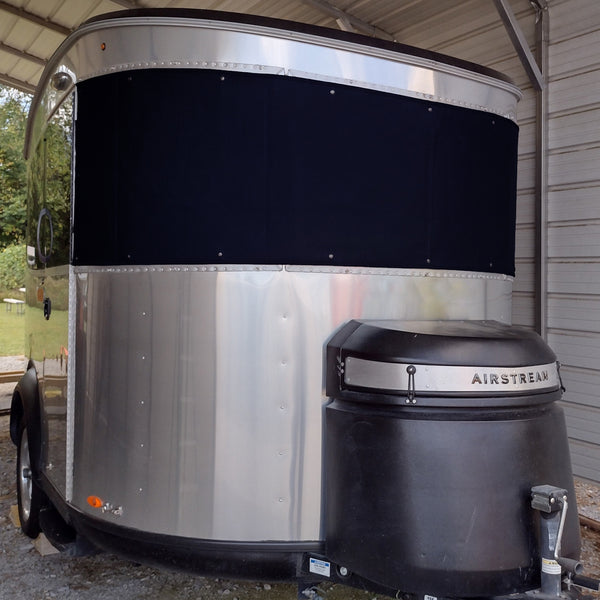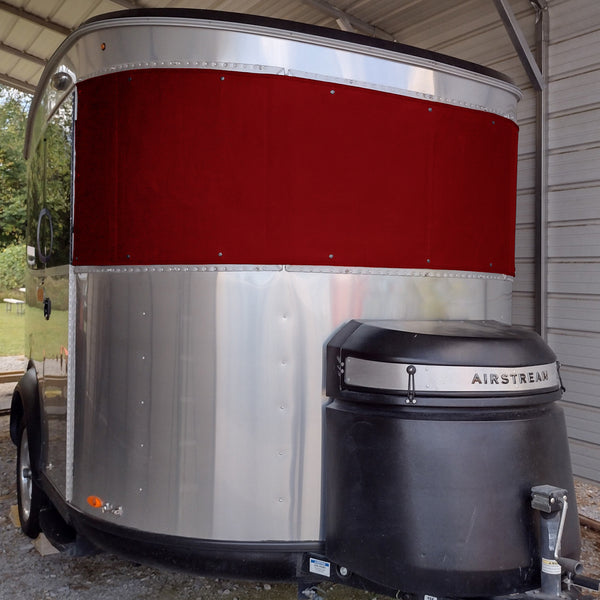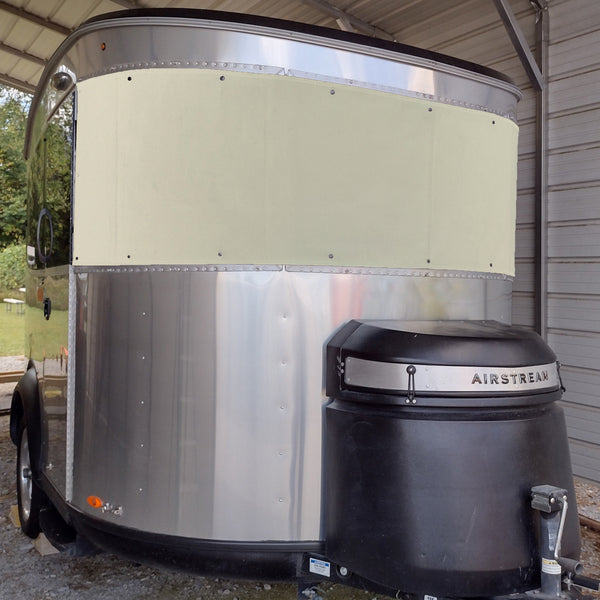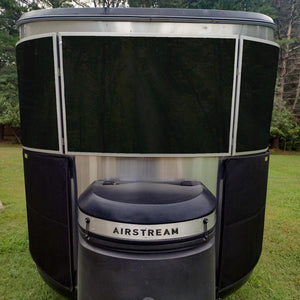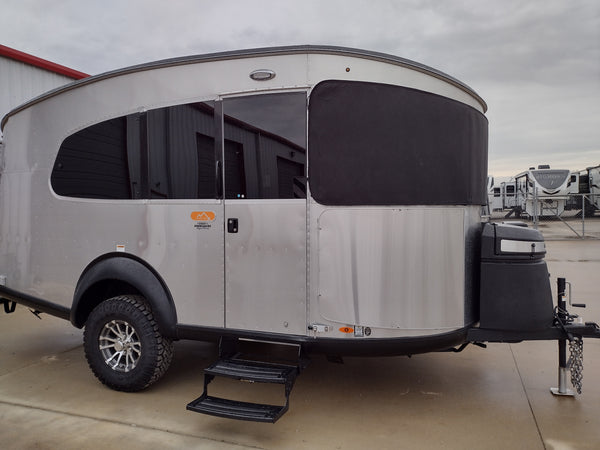
Protect your Airstream Basecamp Travel Trailer's panoramic front windows with our custom-designed Airstream Basecamp Padded Window Protector by Cool Custom Canvas.
Easy to install and designed to remain in place while in motion, and can be easily removed at the campsite, these custom-made products help shield the front panoramic windows of your standard Basecamp 16 or Basecamp 20 from flying road debris.
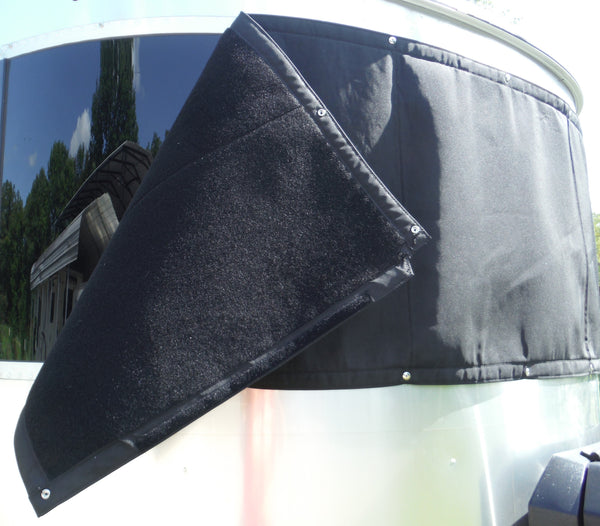
This padded window cover is 1/4" thick and made from 2 layers of the highest quality USA-made materials. All materials and fasteners are marine grade.
Exclusively available at Airstream Supply Company, our Padded Window Guard Covers are compatible to fit all Basecamp Travel Trailer models.
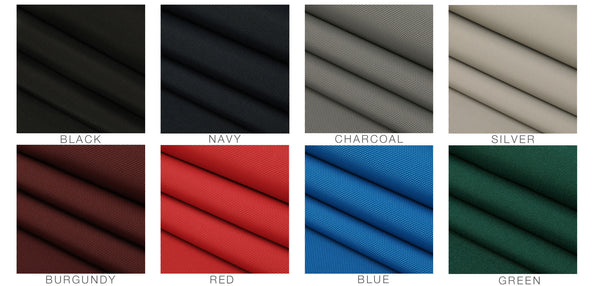
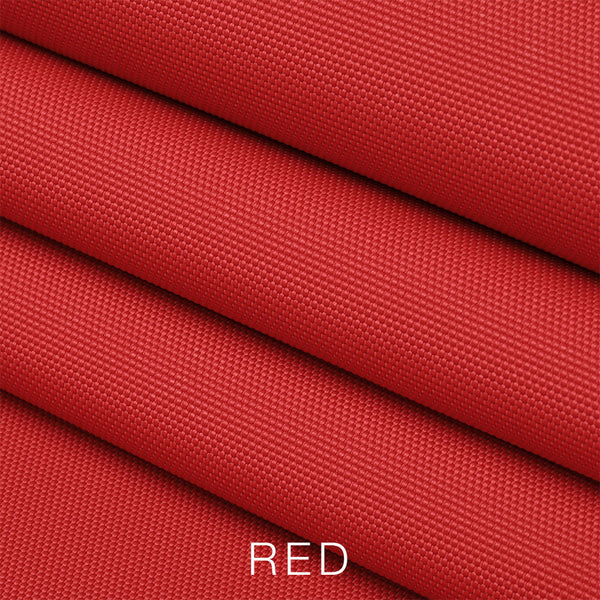
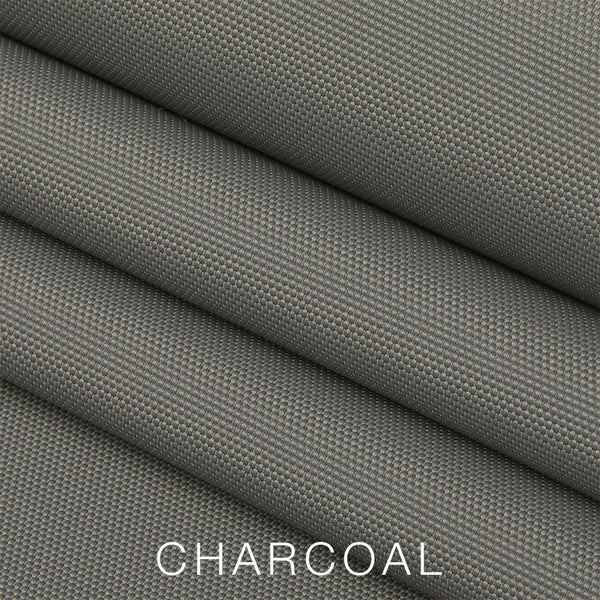
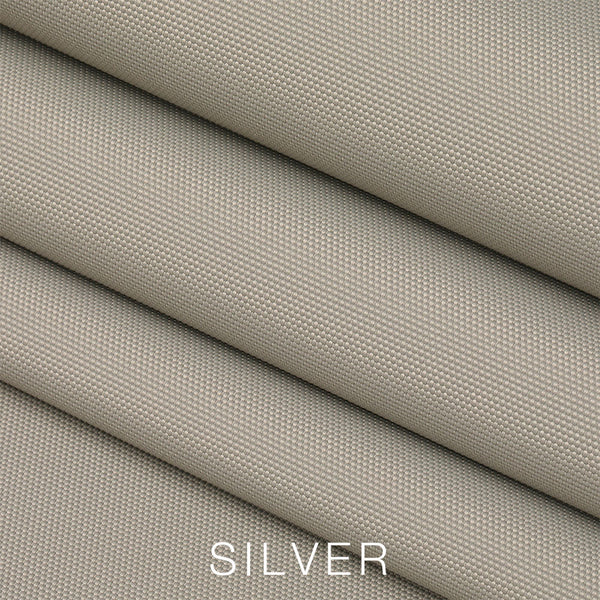
Pick Between Eight Different Color Options

Basecamps with the optional X-Package
The optional X-Package adds front solar rock guards as added panoramic window protection. Our X-Package guards are compatible with your Basecamp X, including Basecamp 16X, Basecamp 20X, and all REI Co-op Special Edition Basecamp Travel Trailers.

No Hardware Required
Our custom-designed Padded Solar Window Guard Covers are lightweight and a 1/4-inch thick, with two layers of padded materials for excellent protection from road debris that can be kicked up by tow vehicle wheels.

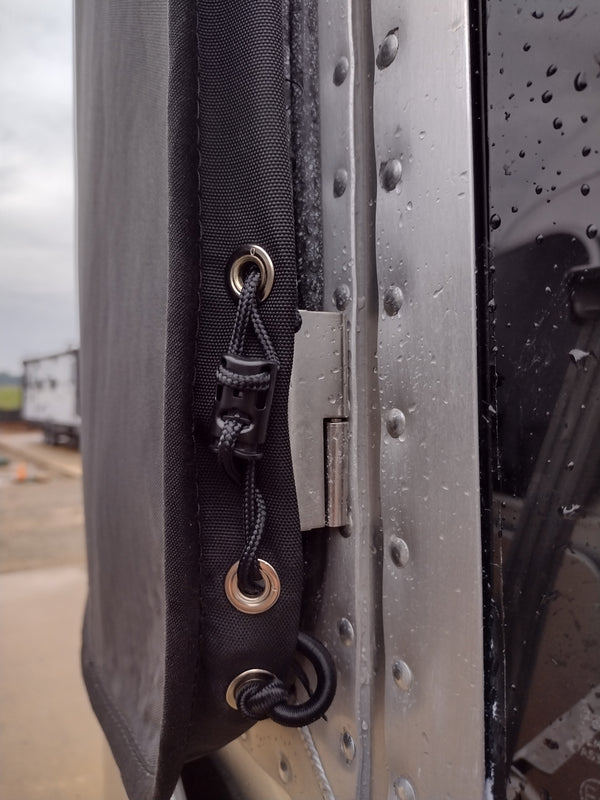
The cover is held securely in place with a strong elastic band that goes around the outside of the windows. Pass-through points make room for the elastic fasteners on the central window guard, and marine-grade sail rope secures behind the solar guard hinges to help ensure the cover won't slip off while traveling.
To view Basecamp 16X and 20X installation instructions, click here.
Basecamp 16 or 20 Standard Packages
Pick between two different options: adhesive application which requires no drilling OR screw-in snaps with drilling required. The screw-in snap option is a bit more advanced of installation but will allow you to match up the snaps with your factory placed rivets on the window frame.
Adhesive (No-Drill) Snaps
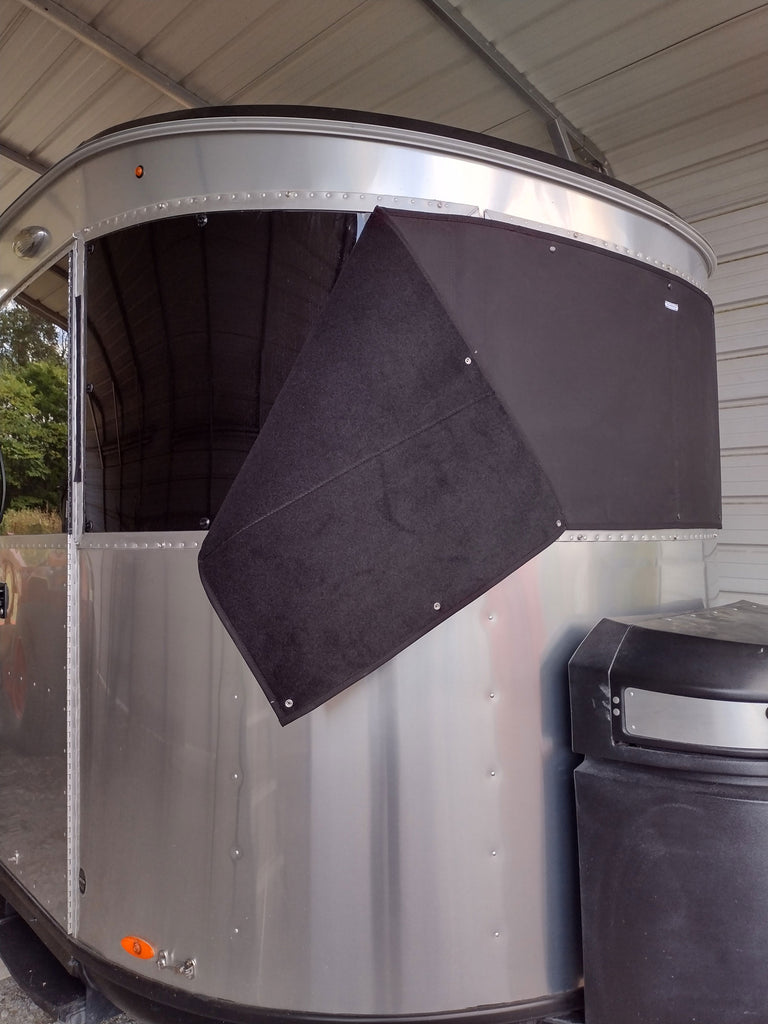

The Basecamp 16 and Basecamp 20 Standard adhesive kit comes with high-quality adhesive snaps that go directly on the windows. No drilling is required. Best adhesion will be achieved by applying in warm temperatures. If applied below 50 degrees Fahrenheit, the snaps will take longer to develop full adhesion strength (a handful of days, ideally in the sun)
The kit comes with snaps already installed on the cover and includes everything you need to install the adhesive snaps on your windows, including detailed instructions with photos.
To view installation instructions for the Basecamp 16 and 20 Adhesive Option, view here
Screw-In Snaps (Drilling Required)

The Basecamp 16 and Basecamp 20 Standard screw-in snap kit comes with high-quality screw in snaps that get drilled in directly around the window framing. You will be installing snaps on both the trailer and the cover. This option allows you to match up your rivet aligned with the snaps.
Please note: Airstream assumes no responsibility for any issues arising from drilling holes into your Basecamp
To view installation instructions for the Basecamp 16 and 20 Screw-In Snap Option, view here
Product Features
How to Install Basecamp Padded Window Covers
Please note, we offer three different options of window covers. Basecamp 16X and 20X models have a different installation than standard Basecamp models. Standard Basecamp 16 and 20 models can pick between adhesive snaps (no drill) or drilling in snaps. Please scroll down until you see your option
Basecamp 16 and 20 Standard Models
Adhesive (No-Drill) Snap Installation Instructions
In addition to reading these instructions below, you can view a video of the installation process available here.
Step 1. Prepare the cover by snapping the adhesive snaps onto the existing snaps on the back of the cover, except for in the top center. Top center is indicated by the CoolCustomCanvas.com label. Do no remove the paper backing yet.
Also, install the provided adhesive velcro in the outside corners of the trailer window. This velcro is only temporary and will be used to help hold the cover in place during the installation process.

Step 2. Locate center on the top and bottom of the window. Install tape at the center on the metal frame just outside the window, and mark a line on the tape to indicate the exact center positions, top and bottom.
Step 3. Determine the position of the top center snap using the provided cardboard template. Hold the template at the upper edge of the window, and align the center line of the template with the center line you made on the tape. Secure the template in this position using additional tape. Run the tape vertically up to the metal window frame, so that you can still lift up the template to clean the window
underneath.
Step 4. VERY IMPORTANT. Clean the window surface thoroughly as described below before applying the snap. For the first snap, lift the template up to clean underneath.
It is EXTREMELY IMPORTANT to clean the window surface well before applying the adhesive snaps. The cleaning process below is to remove the OIL RESIDUE and dirt from the road, which can be hard to see and may not be obvious. If you do not follow the steps below fully, you may just be pushing road oil and dirt around rather than removing it. This can cause snap failure.
- Use a dry paper towel to wipe the area to remove any oil or grime that you can.
- Use Windex and a new paper towel to clean the area again. The Windex will help loosen additional oils and debris.
- IMPORTANT! Use the provided alcohol pad now to thoroughly clean the area again.
- Final step. Wipe the area you just cleaned again with a new dry paper towel to ensure all hidden oils are removed.
Step 5. Apply the top center snap. With the template in place, remove the paper backing on the adhesive snap, and place it in the center hole of the template.
IMPORTANT: The adhesive on the snaps is pressure sensitive. After applying, you need to press firmly all around the snap – around all the edges and in the center– for a good 10-15 seconds. Sufficient pressure is necessary to obtain good adhesion.
Step 6. With a helper, place the cover onto the window using the previously applied adhesive velcro to hold it in place. The single top snap is not strong enough to support the entire cover, so you will need to use the velcro at this stage. Adjust the position of the cover up and down and side to side until you can snap the top center snap in place and until the cover is smooth and sits evenly around the entire window.
With the cover in place, peek behind the cover to examine the remaining snap locations to be sure the adhesive snaps will land on the window, not on the metal window frame outside the window.
Step 7. Now install the bottom center snap by repeating steps 4 and 5. DO NOT remove the snap from the cover to install it. Keep the snap on the cover, remove the backing, and press on it firmly against the window from the outside of the cover.
Step 8. Continue working outward from center, installing snaps one at a time, alternating top and bottom. Repeat steps 4 and 5 for each snap.
Step 9. When done with snap installation, carefully remove the cover from the window. After removing the cover, press firmly for several seconds on each snap again, to make sure they are firmly adhered to the window. Remove the temporary adhesive velcro from the window. If any adhesive residue from the
velcro remains, remove it with rubbing alcohol, or, if needed, Goo Gone or a similar adhesive remover, which can be purchased at any hardware store.
Step 10. The following is recommended in all temperatures, but for sure in temperatures 50 degrees F and below: Allow the snaps to sit in the sunlight without the cover on for a handful of days to help provide warmth to promote full adhesion.
DIY Screw-In Snap (Drilling Required) Installation Instructions
It is HIGHLY RECOMMEND reading the complete instructions fully prior to installation. This is just an overview summary to help get you oriented.
Summary (Full Instructions Below)
- Place temporary velcro on window in middle, top and bottom, and one strip each on left and right sides. This is just to hold the cover on the window for alignment and positioning.
- Mark snap placement on window framing and install screw snaps. Please read directions thoroughly for this step, so that snaps are placed correctly, and no window damage occurs.
- Mark window frame snap locations on cover for placement of snaps in the fabric. Use needle pin snaps (provided) to easily mark snap installation locations.
- Install only the 2 center snaps first, one top and one bottom. Reinstall cover onto window to help with placement of the next snaps that you will install.
- Work out from the center evenly, left and right, until you get to the end. Take your time to double check everything as you are making marks and installing the next set of snaps.
- Remove temporary velcro from window. Install permanent velcro strip on plastic window covers at left and right ends.
Note: This is a summary only. We highly recommend you read the complete instructions to make sure you fully understand all directions to ensure proper installation.
Full Screw-In Snap Instructions
For this installation, you will be installing snaps on the trailer and also on the cover. The cover comes with chalk markings to indicate approximate snap locations, but this is just a guideline – your actual snap locations may vary slightly depending on the exact locations of existing factory rivets in your window frame. There are 22 snaps on the Basecamp 16, and 26 snaps for the Basecamp 20.
The snaps on the trailer will be installed in the metal framing around the window, where factory rivets are already installed.
POSITION THE COVER
Step 1. Locate center on top and bottom of the center window frame. Install tape on the top and bottom of the window frame at this location. Make a line on the tape with a marker to indicate the exact center location. This will help with positioning the cover evenly.
Step 2. Install the provided temporary adhesive velcro on the window in the center, top and bottom, and one piece on each on left and right sides (see Figure 1). This velcro is only temporary and will be used to help hold the cover in place during the installation process. To avoid getting any adhesive residue from the velcro on the window, place blue painters tape on the window first (not provided), then place the velcro on top.
Place the cover up on the window. The velcro will temporarily hold the cover in place so you can position and re‐position as needed to refine the cover position and locate ideal snap locations. Position the cover so that it is centered over the window side to side and top to bottom. The label on the cover should be on top, and there is a stich line running down the center of the cover which you can use to help align it. How you position the cover now is how the cover will sit when it is fully installed.
MARK AND INSTALL SCREW SNAPS ON TRAILER
Step 3. Once the cover is centered on the window, use the chalk markings on the cover as a guide for where to mark snap locations on the trailer, as described below. It is ok if your snap locations are slightly different than marked on the cover.
The snaps will be installed into the metal framing around the windows (see Figure 2).
MOST IMPORTANT, is that the snaps on the trailer MUST be placed in line with existing factory rivets – not above or below them closer to the window (see Figure 2). Drilling higher or lower toward the window can damage or crack the window. Snaps should also be placed in between existing rivets ‐ they cannot overlap with existing rivets. They must screw in flat against the surface.
For each snap location, before drilling any holes, place a piece of tape on the trailer frame in the location where you plan to install the snap. Use a marker to place a dot exactly where you will drill – remember the drill holes in the window frame must be in line with existing factory rivets, not closer to the window.
The corner snaps on the driver’s side (the side opposite the trailer door) may end up very close to or even on the weld at the corner of the window. If the weld is relatively flat, it is ok to drill in the weld and install the snap on top of it – as long as the snap can be flat or close to flat on the surface. Otherwise, install the snap right before the weld.

Step 4. Install snaps on the trailer. Once drill locations are marked, you may remove the cover to install snaps on the trailer (DO NOT remove the temporary velcro yet). Only use the provided drill bit (9/64”).
Drill directly through the tape on the dot you marked. Once the hole is drilled, remove the tape, and use only a hand held screw driver to screw in the snaps (do not use a drill with a screw driver attachment). Do not over tighten screws. Over tightening screws can strip out the hole or break off the screw head. When the snap screw stops turning and is flush with the surface, you are done. For additional weather proofing, use red or blue Loctite on screw threads (not provided).
MARK AND INSTALL SNAPS ON COVER
Step 5. With all snaps installed on the trailer, put the cover back up on the window using the previously applied temporary adhesive velcro. Align the cover again so it is centered on the window side to side and top to bottom, and making sure it reaches all snap locations. Take your time on this step to adjust and examine all snap locations to make sure the cover reaches all snaps.
Your kit comes with 2 needle pin snaps. These are the female portion of the snap with a needle sticking out. These fasteners are placed on the male snaps you installed on the trailer, so the needle portion can be poked through the fabric, making a small hole exactly where the snap will be centered (see Figure 3) – you can mark the hole with a silver marker or chalk to make it easier to see. As described below, use these needle pin snaps as needed to check positioning and to mark exactly where to install snaps on the cover.
Step 6. Install the first 2 snaps on the cover – start with the 2 center snaps, top and bottom. With the cover in place, install the needle pin snaps in these 2 center locations on the trailer. Press the cover into the needle portion of the pin snap until it pokes through the fabric. This will make a small hole in the fabric which marks exactly where to install the snap. The hole may be difficult to see because of the stich line ‐ if so, mark the hole with a silver marker or piece of chalk (not provided). Remove the cover from the window to install the 2 snaps at the marked location as follows (NOTE: install only these 2 snaps at this time)
- A piece of scrap fabric and 3 extra snaps are provided so you can practice snap installation before proceeding on the actual cover.
- Use the provided drill bit (9/64”) or a 1/8” hole punch (available at any hardware store) to make a hole in the cover at the marked location
- The snap you will install on the cover has two parts – the rounded “button”, which will be on the outside of the cover, and the “socket” which will face the trailer.
- Follow the illustration on the card that accompanies the snap installation tool, and/or view the video, to install the snap into the hole you just created in the fabric. You will need a hammer. Be sure to use the installation tool on a hard surface such as a concrete driveway or sturdy work bench. If you hammer on a soft surface, such as grass or a fold‐up table, the snap may not install. You will know the snap is properly installed if you grasp the socket and try to twist it – it should not twist easily.
Step 7. Remove the needle pin snaps from the trailer to use them in the next installation locations. See Figure 3.
Step 8. With the first 2 snaps installed on the cover, put the cover back up on the trailer, securing the completed snaps in place on the trailer. Again, use the temporary adhesive velcro to position the rest of the cover appropriately. Install the needle pin snaps to the next snaps out from center, 1 top and 1 bottom. Next, install the top and bottom snaps on the other side of center. Continue installing snaps, 2 at a time, working from the center out, evenly left and right, until you get to the end. After each installation, return the cover to the trailer and snap in place before marking the next installation locations. Double check remaining snap locations as you go to make sure everything is lining up correctly.
Once all snaps are installed, remove the adhesive velcro from the windows. If you did not apply painters tape under the velcro, any remaining adhesive residue can be removed with rubbing alcohol or any adhesive remover. If any chalk marks remain visible on the cover, they can be removed by wiping with a wet cloth.
Step 9. The last step is to install the permanent velcro on the plastic piece at the edge of the window, where the cover ends. There is a corresponding piece of velcro sewn onto the cover. Clean the surface well with the alcohol pads supplied. Press the adhesive velcro firmly in place so that it will mate with the velcro sewn onto the cover. The permanent velcro will take 24 hours to develop full adhesion, or longer if it’s cold. Be very careful removing the cover from the velcro right away because adhesive will not be fully cured yet.
Figure 1

Figure 2

The snaps in the metal window frame should be placed in line with and in between existing factory rivets. DO NOT drill closer to the window that the factory rivets, as this may damage the window.
Figure 3


Use the snap positioners to help mark exactly where to place the snaps on the cover
Basecamp 16X and 20X: X-Package Models
You can view a video of the cover installation on YouTube here
PLEASE NOTE: Allow yourself some time to practice putting the cover on. Read the tips below before you put it on the first time. The cover has a tight fit to help it stay securely in place. It will be difficult to put on the first time or two, but rest assured, it will be easy once you’ve done it a couple of times.
You will need a three-step step stool or small ladder that allows you to see over the top of the windows. Installation will be easier with two people, but can also be accomplished alone.
PRIOR TO INSTALLATION
Where the windows meet, the corners of the windows are extremely sharp. The cover is reinforced at this point, but it is recommended to go over the very corners of the windows with fine grit (400) sand paper to reduce the extreme sharpness of the corner. We have provided a small piece of sand paper for this purpose. You only need to sand the very corners of the windows (top and bottom) where the metal framing meets.
STEP 1: START WITH THE HINGES
1. Start with the top hinges. On one side, use your stool to position the cover so that you are able to pass the rope behind the hinge and through the lower grommet on the cover. Then squeeze the cord lock and pass the rope through the lock. The cover should now be held in place on that hinge. The rope should not be tight – just so the cover can’t fall to the ground.
2. Firmly tug and pull the cover around to the opposite side, and fasten the rope behind the other top hinge. It will take some effort to pull the cover into place to get the rope fastened on the opposite side. Again, it does not need to be tight – just so it is loosely held in place on the window. Leave the bottom hinge ropes unfastened for now.
STEP 2: WORK THE ELASTIC POCKET AROUND THE WINDOW
Starting at the top outer corners (where the hinges are), pull the elastic pocket around the top corners of the windows. Then work in the middle top area to make sure the elastic pocket rests on top of the windows and is not tucked behind itself. Once the corners are in place, tighten the rope behind the top hinges to help keep things in place.
Next move to the bottom middle window and work out from the middle to the corners, pulling the elastic pocket around the bottom of the windows. When you get to the corners, loosely fasten the rope behind the bottom hinges, just as you did for the top hinges.
While working on the lower part of the windows, the elastic on the top may partially pop off....just go back and put it in place. You will need to go back and forth a bit between top and bottom of the window until the elastic pocket rests outside the window all the way around.
The bottom corners will be the hardest part. Once bottom corners are in place, secure the rope behind the bottom hinges as you did for the top hinges.
Finally, make sure the elastic that runs vertically between the windows is resting as much as possible in between the windows. You may need to tug the cover left or right a bit.
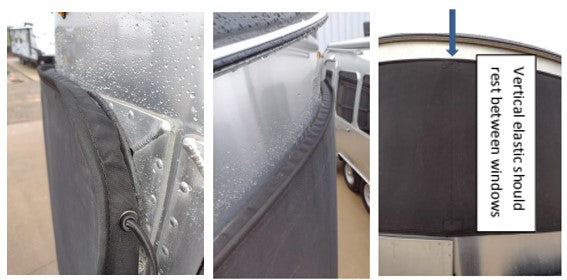
STEP 3: SECURE THE HINGES
Tighten the cord behind the hinges to a tight fit, and secure the cord end by twisting it around itself and back through the lower grommet.
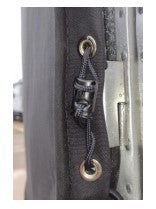
Finally – tug on the cover to make sure it is firmly in place.
For a printable page of instructions, please click here
Shipping FAQ
Return Policy
VISIT THE MOTHERSHIP
Take a factory tour, step back through Airstream history in our Heritage Center, and grab some authentic Streamer gear.
MADE JUST FOR YOU
From custom-sized bedding to teak mats and replacement curtains we have all the custom goods that are made especially to fit your home on wheels.

